We here at Dalinghaus spend a good deal of time educating the public on:
Earthquakes are also a significant area of concern here in the Hollywood State. All experts agree the Big One is imminent. Earthquakes can deal a brutal blow to your home’s foundation.
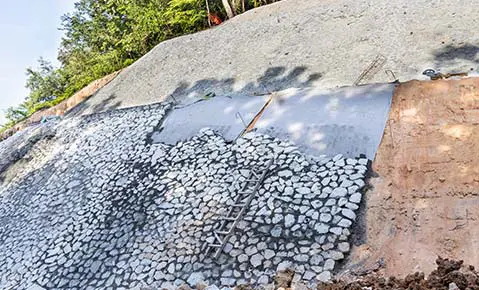
Seismic retrofitting secures your raised foundation home in the event of a seismic disaster.
Raised foundation homes are particularly susceptible to seismic activity.
It is imperative to ensure your home is secure in the event of an earthquake. This article is going to cover:
- What is Seismic Retrofitting?
- Seismic Retrofitting Techniques
- Implementing a Titen HD to secure the Mudsill to the foundation (vertical support)
- Universal Foundation Plate Installation to anchor the Mudsill to Foundation (horizontal support)
- Implementing Blocking (provides nailing surface for sheathing when mudsill is wider than the cripple wall)
- Installing sheathing/plywood to reinforce the cripple wall
- A-35 Brackets

What is Seismic Retrofitting?Seismic Retrofitting is the reinforcement, modification of an existing structure against anticipated seismic activity and the subsequent fallout (soil failure and aftershocks). |
Seismic Retrofitting is a relatively new term with etymology stemming out of the 1960’s and 1970’s seismic codes. The term is an amalgamation of two separate words – seismic and retrofit.
Webster Dictionary’s definition of retrofit –
To furnish (something, such as a computer, airplane, or building) with new or modified parts or equipment not available or considered necessary at the time of manufacture.
Webster’s Dictionary Definition of seismic –
of, subject to, or caused by an earthquake.
The idea is to go back over, to modify, to fix/improve previous work. That’s what seismic retrofitting is all about – strengthening the structure that is already there.
Types of foundations that need to be seismically retrofitted are:
- Post and Pad Foundations
- Cripple Wall Foundations
- Stem wall
Important Note
Before we begin, not all raised foundations and crawlspaces can be seismically retrofitted. Why? Because we need clearance, Clarence.
Space in the crawl space is key. We here at Dalinghaus prefer your crawlspace to be at least 2 feet high, but the lowest we’ll go is 18 inches.
Even if your crawl space opening looks great but narrows deeper in – it’s a no-go. We need room to operate. We often have 3 to 4 guys underneath your home at once.
Following are a few of the current methods utilized to seismically retrofit one’s home.
Seismic Retrofitting Techniques
Titen HD
A Titen HD is a screw that is utilized to secure the mudsill to the foundation. Installation is relatively simple with no specialized industrial-grade tools required.
The Titen HD’s diameter is 5/8 inches, and the length is dependent on the density of the mudsill. The Titen HD’s are spaced on average 6 feet apart.
2 washers are utilized per Titen HD to lock the anchor in place.
UFP Seismic Retrofitting Steps
What’s great about the UFP plate is that it requires minimal space to install and allows for the cripple wall to be secured to the foundation from the side – allowing easy application where little to no vertical clearance is available. The plate simply connects the mudsill to the foundation.
Step 1 –
Mark UFP locations all the way around the perimeter of the crawl space (beginning at 12 inches from all corners, then spaced out every 6 subsequent feet.
Step 2 –
Drill the corresponding UFP holes at least 4 inches deep into the foundation that are ½” in diameter.
Step 3 –
Utilize an air compressor to blow out drill points.
Step 4 –
Implement Titen ½ inch bolts to secure the bottom of the UFP to the foundation, utilizing a socket wrench to ensure a tight fit.
Step 5 –
Hammer the top of the UFP into the mudsill.
Step 6 –
Seismically retrofitted approved straps are attached to the bottom of the posts and T straps are attached to the top.
Step 7 –
Rinse and Repeat
Fun Facts with Brian – Here at Dalinghaus we utilize nails because they are seismically retrofit approved, whereas screws are not because they can warp and fail.
Blocking
Blocking is utilized when the mudsill is wider than the cripple wall, which impedes the sheathing process because there is not enough surface area to nail in the plywood.
Sheathing
Sheathing is plywood utilized to reinforce the cripple wall by adding extra external support, limiting the amount of possible play during an earthquake.
It is absolutely imperative that the nails are put in securely to enhance the wall’s ability.
A-35’s
A-35 Brackets are specifically designed to ensure the subfloor and cripple wall are anchored to one another.
These brackets are installed between the top plate of the cripple wall and the joists/new blocking of the subfloor.
Remember
UFP’s connect the foundation to the mudsill.
A-35’s connect the cripple wall to the subfloor.
Dalinghaus Can Seismically Retrofit Your Home
If you reside in southern California and own a raised foundation home, you should seriously consider seismically retrofitting your foundation.
This will not only secure your home (your biggest financial investment) but your peace of mind.
If you live in SoCal or Central Arizona and would like a FREE foundation inspection, click on the link below –