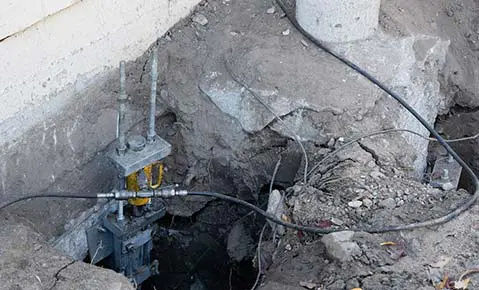
If you find yourself reading this article and have absolutely no clue how helical piers work – don’t sweat it. It’s our job to educate the masses on everything to do with foundation repair.
You might also like our articles on what are helical tie-backs? Hint – they’re not a mathematical torture device.
So, whether you just had a foundation repair inspection and the company recommended helical piers or you are just curious about the magical world of helical piers/piles/anchors, we got you covered.
A lot of foundation repair specialists that come out to visit you will have a difficult time describing just how helical piers work.
Worst case scenario, you get some unintelligible answer like how Joe Dirt’s father responded to his son:
“How xactly is a rainbow made? How xactly does a sun set? How xactly does a posi-trac rear-end on a Plymouth work? It just does.”
We are here to walk you through the: it just does.
Think of helical piers as a large screw that sinks into the earth – and, just like you would use a screw to support a picture on the wall, the helical screw will support your home by keeping it in place.
I always like to think of Push Piers as nails and Helical Piers as screws.
Helical Piers Broken Down into 3 Sections –
- A lead or starter section
- These come in a variety of lengths and have your actual screw characteristics, the threads/and or flights. The lengths can be 3′, 5′, 7′, 10′ or 20′. The screw or helixes will have sizes ranging from 6″, 8″, 10″, 12″, 14″, and 16″. The most common size of helixes for home foundation repair is an 8″ and 10″ configuration.
- Extensions
- Extensions are connected to the lead section to continue installing to greater depths. These also come in a variety of sizes, but the most common size used is 7’.
- Remedial Bracket
- Remedial brackets connect to your home’s foundation and the helical pile. This bracket is also utilized to lift and stabilize your home.
The Prep Work
Now, here are exactly how the puzzle pieces fit together. The first thing that will happen on a helical pier foundation repair project is the excavation of each pier location.
These holes are generally 3×3 feet and spaced out every 6 feet. Occasionally, a little bit of Concrete R&R is required to reach your footing.
Fun Fact with Brian – most footings in SoCal and Arizona are an average of 18 to 24 inches.
This excavation will go past the bottom of your home’s footing/foundation.
I like to tell the crews it’s like digging for buried treasure, our painters tape marks the spot (we use painter’s tape every six feet to demarcate pier locations because it doesn’t hurt your stucco, side-paneling); but that fails to bring the joy and enthusiasm you would imagine.
Digging holes is grueling hard work, just ask Stanley Yelnats.
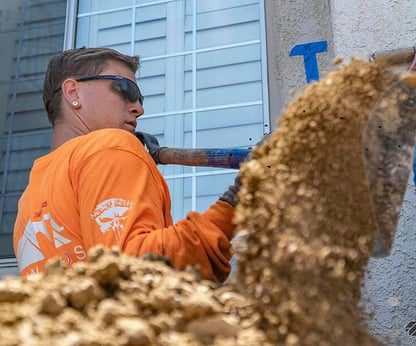
Once the bottom of the footing is reached, the excavation continues another 18 inches below the footing.
This provides ample room to snugly fit a remedial bracket to your home’s footing after it’s been manicured down with a jackhammer.
We always cut away excess concrete to ensure a gapless connection to your home’s footing.
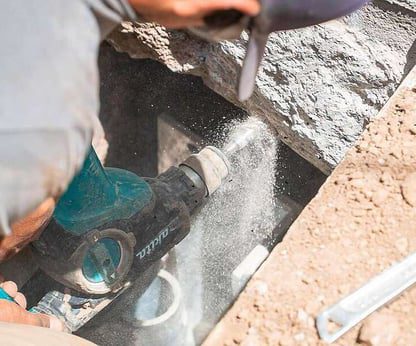
Once the pier holes have been excavated and no treasure found, the crew begins the helical pier instillation process.
Mathematical Math
Before the Helical Piers can be screwed into the earth, some calculations need to be made.
The helical is installed to a required load which is monitored and calculated by the installation torque.
This torque achievement can happen anywhere between 7 to 150 feet depending on the soil conditions.
Now, if torque is a foreign term to you (and it may prove even more Greek than when we discussed helical piles – Opa!), don’t worry.
Torque for a helical pile installation is simply the amount of force that is required to spin/rotate the helical into the ground.
The denser the soils, the greater the torque required to spin the helical into the ground.
Once we know the load and we know the helical material that will be utilized we can calculate the amount of torque that will be required to achieve the desired load.
Here is how Torque is calculated:
(Load Required/Kfactor)x Drive Head Torque Conversion = Torque Required
Let’s put it in numerical values that are similar to your home.
Load required – 5,600 pounds
Material Kfactor – 8
Drive Head Torque Conversion – 2.5
(5,600/8)x 2.5 = 1,750 ft/lbs of torque needed to achieve the required load.
Now that we have our compound math completed for the day, let’s jump back into the helical pier installation!
The helical pier installation process
So, the holes are dug and the calculations have been made. It’s time to install.
To install the helical pier, we utilize a hydraulic drive head that is attached to a hydraulic power pack or hydraulic pump.
These hydraulic pumps can range in size tremendously. We either utilize a smaller hydraulic power pack (that is about the size of a wheelbarrow) or a larger power pack the size of a mini excavator.
Both work but the speed of instillation varies on the capabilities of the hydraulic pump. The greater the flow rate on the pump, the quicker the installation will go.
The hydraulic drive head weighs around 150 pounds for most residential applications.
But, did you know, drive heads can be as big as a car!
Obviously, these gargantuan bad boys are utilized to install massive piers that can handle extremely high load requirements.
This is a big part of the reason why the cost of helical piers is noticeably higher than Push Piers.
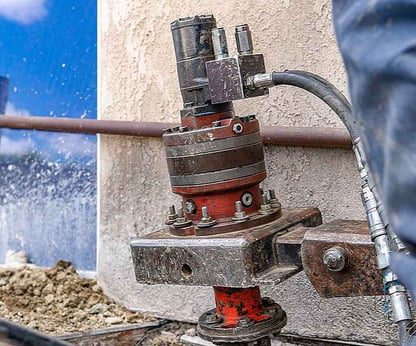
The drive head has an adapter that will marry the helical material to the hydraulic drive head. Once the two have been linked together, we can install our torque bar.
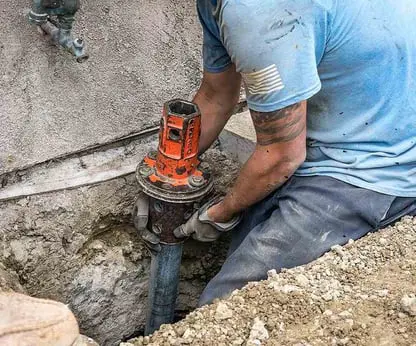
The torque bar is utilized to stop the drive head from just spin, spin, spinning on the helical pile.
You know, like a professional yo-yo with a slick ball-bearings.
The torque bar is attached to the drive head and then positioned on a stationary object 5-6 feet away.
This has to be done correctly.
If the torque bar is not secured to a stationary object, then once the drive head reaches a higher torque, it will take out anything in its path.
Torque bars are kind of like PTO shafts for our agricultural readership – torque bars are potentially dangerous and, thus, treated with incredible respect.
Safety is our utmost priority.
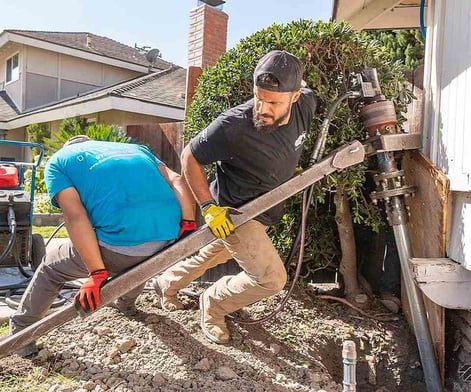
From there we begin to screw the helical piers into the ground.
During the installation process, we document and log the installation torque (recorded from a gauge attached to a hydraulic drive head) for every helical installed at 2-foot intervals.
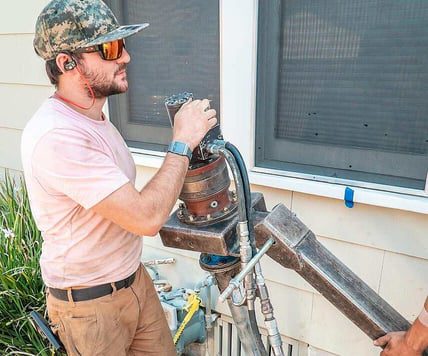
After the lead has been installed and if we haven’t quite hit our required torque, we remove the drive head and add an extension to the lead.
We remount the drive head and continue the installation, always on the lookout for that perfect torque requirement reading.
This process is rinsed-and-repeated until torque has been achieved.
Once the helical pile has been installed to the desired torque, it is cut to size. This cut typically occurs at 18” from the bottom of the footing measuring up to the newly installed helical pier shaft.
Note – some cuts will be higher or shorter depending on the amount of lift that is required to bring up your home to maximum practical recovery.
We then attach our handy-dandy remedial bracket to your home’s foundation with mechanical anchor bolts or epoxy anchor bolts.
Both work, but some cities, counties, and engineers prefer one over the other.
Once the bracket is mounted, we attach our lift assembly to the bracket and install a hydraulic lifting jack.
The jacks are monsters and have a capacity of 20 tons to 40,000 pounds of available power to lift your home’s foundation back to maximum practical recovery.
After all of the jacks and lift assemblies have been properly installed, we pressurize the jacks and begin the lift of your home.
The lift will go pretty quick. Okay, so construction time is kind of like island time, but we think 2 hours is pretty fast for lifting a whole house.
Okay, so pretty quick in construction terms averages out to about 2 hours. In reality, the prep work of getting all of the lift assemblies ready will take longer than the actual lifting of your home.
When we lift a home, we monitor the floor elevations with a manometer.
We lift the home in unison, all jacks lifting simultaneously, but sometimes one area goes up faster than another and reaches maximum practical recovery.
Once the desired lift has been achieved on one section, we simply close off the valve on the jack and let the other jacks keep pushing on.
After the lift is completed, we tighten all of the bracket components and begin the backfill phase of the project – refilling all of the previously excavation locations.
In the end, your home is at maximum practical recovery, the holes are filled, and it looks like we were never there.
Here is a video of the entire helical pier installation process
And that is it! Simple enough!
Helical Pier installation takes a lot of experience, talent, and hard work.
The biggest issues is not your wonky foundation, it’s not comprehensively understanding the tools and correct process utilized to correct your home’s foundation.
We strongly recommend if you still have questions about the fascinating world of helical piers and you’ve read our articles…
What are the best helical piers to use?
25 Questions to Ask When Hiring a Foundation Repair Contractor
…get our Free Foundation Repair Guide. This guide will allow you to learn more about the foundation repair signs and symptoms, as well as provide some general knowledge about how we repair foundations.
Get a FREE Foundation Inspection, the absolute best solution to having all of your questions answered and provide you with valuable home data and peace of mind.

