Not sure what to expect during your helical pier foundation repair? Are you a little concerned about the mechanics of the project? If you’re worried about helical pier foundation repair, then this article is for you.
Dalinghaus Construction Inc. has over 100 years of collective foundation repair experience. We’ve serviced thousands of foundations in Southern California and Arizona. We understand that helical pier underpinning can be a bit of an intimidating experience.
Because of that, this article covers the entire helical pier installation process. By the end of this blog post, you will understand the basic principles of helical pier systems.
What Does Helical Pier Installation Look Like?
Definition of Helical Piers
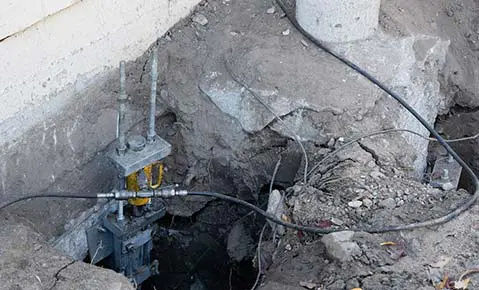
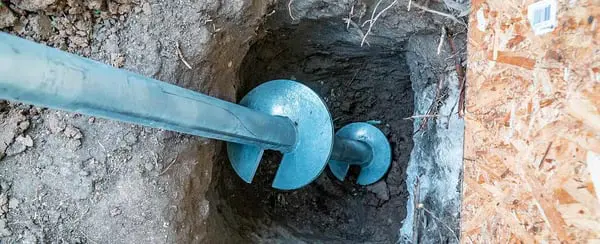
Helical piers are galvanized steel pipes that are hydraulically driven to competent, load-bearing soil and anchored to a structure’s prepped footing via a remedial bracket to secure, stabilize and/or lift a structure. Helical piers have helices at the bottom of the pier to anchor into the soil.
In short, helical piers are like underground stilts that support your home against further foundation settlement. Helical piers are generally driven down to 25 or 30 feet.
Helical Pier Excavation & Installation
Before the helical piers can be screwed down into the earth via a torque motor, excavation sites need to be dug to provide access to the foundation’s footing. A foundation’s footing is the part of the foundation that is buried below the soil (or “grade” in construction terms).
The foundation’s footing needs to be exposed in order to attach the remedial bracket (the key component connecting the foundation to the new underground stilt system). In order to access the footing, we dig.
The excavations are 3×3 feet and generally 18-24 inches deep and are required for every pier location. These “excavation sites” are demarcated by stickers or painter’s tape (an easy-to-remove marker so as not to ruin the house siding/stucco) every 6 feet per the designed repair plan.
After the foundation footing has been reached, the concrete footing is demo-hammered down to a flat surface capable of housing the remedial bracket. The bracket will be capped off at the end of the repair and the hole will be recompacted.
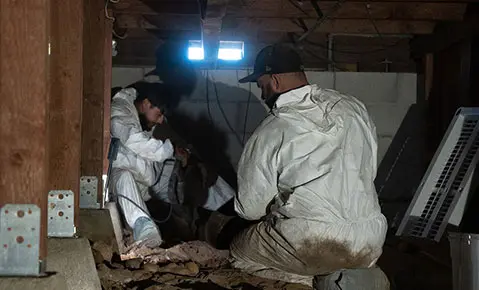
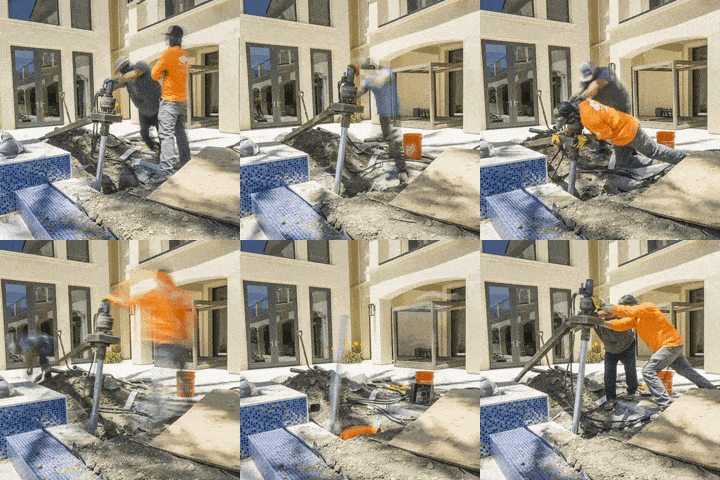
The biggest issue with helical pier installation is that a significant amount of room is required to man the torque motor, which is attached to a torque bar and requires 2-3 crew members to hold it steady.
To simplify – imagine the torque motor and torque bar as a kind of massive screwdriver, zipping piers down to competent, load-bearing soil.
Helical Pier Load Transfer (Lift/Stabilization)
Once all the helical piers have been installed the structure can be lifted back to maximum practical recovery (as far as is deemed safe to lift) and/or stabilized – directly counteracting the foundation settlement.
It’s important to note, there is no such thing as “full recovery.” Your foundation will never sit at its original baseline height again – but it can be releveled.
The beauty of lifting your home is that it does not pose a threat to the structural integrity of your home.
When a home is lifted to maximum practical recovery, hydraulic lift cylinders are implemented at each pier location in unison. The hydraulic cylinders are controlled by hydraulic valves which regulate the hydraulic fluid. A Ziplevel is utilized to take floor measurements during the entire lift to ensure a level lift off.
Certain areas of your home will require less lift than others. The corresponding hydraulic cylinders are shut off while the remaining cylinders continue to lift and reclaim inches.
Lifting a home to maximum practical recovery can take 2-3 hours.
What to Expect during a Helical Pier Foundation Repair Lift:
- Cracked drywall closes back together
- Sloped floors even out
- Slanted window and doorframes return to square
- Doors become easier to open/close
Void Fill /Post-and-pad Adjustments for Helical Pier Repair
During the helical pier foundation repair lift, a void is created underneath your foundation where the settled foundation used to reside. This void will need to be filled to provide even structural support.
In addition, depending on your type of foundation, slab or raised, the interior floor will need to be supported due to the exterior edge of the foundation’s lift.
For slab on grade foundations, polyurethane is utilized, injected between the bottom of the foundation’s slab and the soils to fill the newly created gaps and re-support the structure.
For raised foundations, posts and pads will need to be adjusted to fill the gaps to ensure there is contact with the girder beams that support the subfloor. Busted posts and pads are removed and replaced to ensure the floor is supported.
Helical Pier Final Walkthrough
After the helical pier lift and stabilization, the final walkthrough can take place – a cursory visual of the previously affected areas with careful attention paid to:
- Previous stucco cracks
- Previous drywall cracks
- Previously sloped floors
In addition to visual cues, floor elevation measurements are taken again to compare to the floor elevations during the initial foundation inspection.
Helical Pier Excavation Backfill
After the final repair walkthrough, the excavation holes are backfilled, the concrete is repoured, and/or the shrubs are replanted.
Enjoy Your Dalinghaus Helical Pier Lifetime Warranty
In this article, you received a crash course on helical pier installation and now understand the installation process from excavations to lift. You can now feel confident and secure in your choice to utilize helical piers for your foundation repair.
Dalinghaus Construction Inc. loves to educate the public about all things foundation repair.
To learn more about the benefits of your lifetime warranty, like how it’s inheritable and transferable upon purchase, read our article Dalinghaus Steel System Lifetime Warranty
If you live in Southern California or Arizona and would like to book a free foundation inspection, click the link below.


